Fist things first

Clone your stock remote control

If you plug in the USB to anything that is able to power the dongle, the dongle will stay in clone mode for 5 seconds, if you press button 1, 2 or 3 of your stock remote within this timeframe, it will be cloned by the dongle and it should be able to control the FAN.
The onboard led will lit during “clone mode” and will turn off after the 5sec or immediately when successfully cloned.

Testing the Dongle in Windows

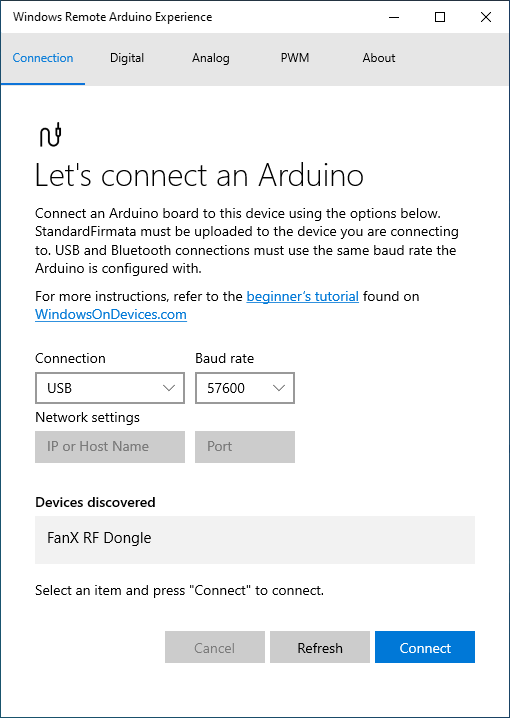
To check whether the Dongle works ok, and if you are able to clone your stock remote, connect the Dongle to the USB port of your computer and open the App: “Windows Remote Arduino Experience”. Click on the “FanX RF Dongle” (USB Connection) and click connect.

Now, open the tab “Analog and enable “Pin A0″, change the FAN speed with your stock remote and check if the value changes, it can take a few seconds before it updates the value.”

Setting up Home Assistant

Install the custom integration

Before changing anything in Home Assistant, it is always a good idea to make a backup. Then you should add the script shown on the left to the yaml configuration.

After this modification, you should reboot Home Assistant and then navigate to “Settings”, “Integrations”. Here you should see the new FanX Firmata integration. If you click on the Dongle, you should be able to see the FAN state if the remote was cloned already.

firmata:
  - serial_port: /dev/serial/by-id/usb-Arduino_LLC_FanX_RF_Dongle-if00
    serial_baud_rate: 57600
    lights:
      - name: fan speed
        pin_mode: PWM
        pin: 3
        minimum: 0
        maximum: 99
    sensors:
      - name: fan speed
        pin_mode: ANALOG
        pin: A0
        differential: 1


Implement the Frontface

To implement a button control on your frontface, add the entity card as shown on the right.
Then, you should put these files in the “www” folder:

Download files

Next, you have to register the JavaScript at: “Settings”, “Dashboards”, then click on the “right top three dots”, hit: “Sources”. You should add a source like on the right picture.

To overwrite the icon shown on the frontpage, you can add the rule shown on the right in configurations.yaml

Download the icon

Click to download and put it in the above mentioned folder. Reboot Home Assistant, goto the frontface, it should look like the picture on the right.

type: entities
entities:
  - entity: sensor.fan_speed
    type: custom:custom-fan-card
    tap_action:
      action: none
title: Mechanische ventilatie
customize:
  sensor.fan_speed:
    entity_picture: /local/icons/fan_blue.png

Flash new software into the dongle

Using the Arduino IDE (installed bootloader)

Plug in the USB dongle, make sure you have the Arduino IDE installed. Select the Arduino Micro target and the right com port. Then open the sketch and click “upload”.

*Please note that by flashing the dongle, the USB name (description) will be set back to the default (Arduino Micro) one. This can be changed by editing this file: “C:Program Files (x86)Arduinohardwarearduinoavrboards.txt”, then goto “micro.name=Arduino Micro” and change this param: micro.build.usb_product=”FanX RF Dongle”

Using Microchip Studio

Via the onboard 6p header, the software can be flashed directly from Microchip studio. You can use the Atmel ICE flasher, or the Atmel ISP MKII flasher. Via Atmel Studio, also the Arduino (micro) bootloader can be flashed. No example projects are available.

Hardware version

Please be aware that there are currently two version of the Dongle: V1.0 and V2.0. They use different bootloader that can be found: here. Please note that Dongle V2.0 uses the Sparkfun micro pro bootloader. By default, the vid, pid and “usb_product” name has been changed in a way that they appear similar in Home Assistant. By changing the application yourself, the names will appear different in Home Assistant, therefore you have to update configurations.yaml or change the boards.txt yourself.